
One of the most powerful features of Salesforce is the ability to consolidate all of the information in your organization into easy to digest reports and dashboards. Users with the ability to create reports will find all of the functionality they need on the Reports tab. Anyone who has worked with Reports before can testify that the feature is very powerful and provides the user with quick insight into their information. The question now becomes, how do I make this information even easier to obtain?
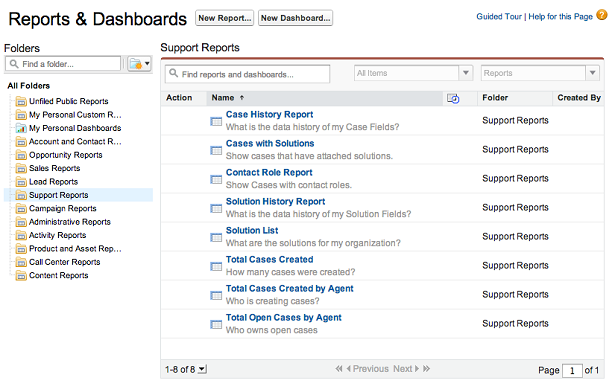
Let’s take a look at a specific scenario. Suppose you work for a company, ABC Products, and ABC Products has a multitude of accounts with open cases at any given time. As the administrator for your Salesforce org, you have received multiple requests to generate a report for your Support Reps to display an account’s open cases at any given point. You take a look at your Support Reports folder and realize that you have no Cases By Account report currently created.
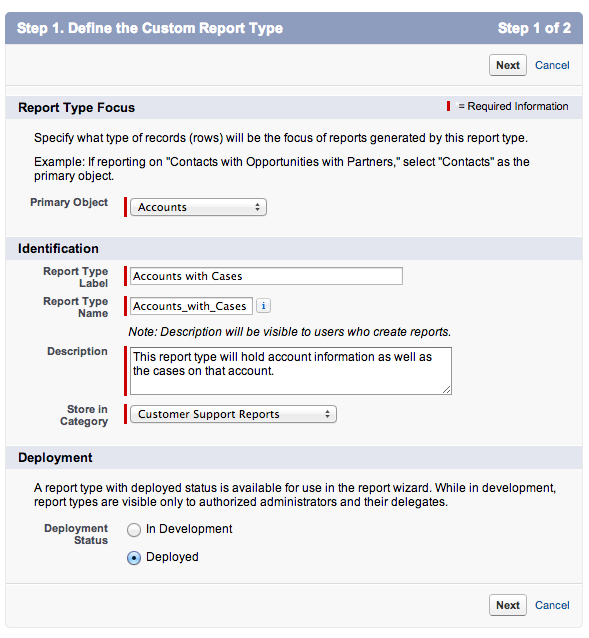
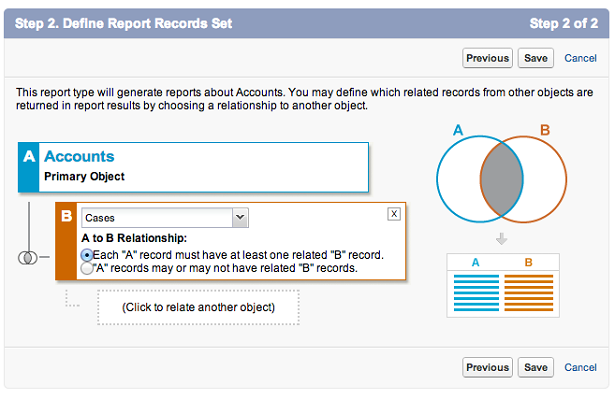
You decide to go ahead and create that report yourself. First, you start off by creating a custom report type, since Accounts with Cases is not a valid report type by default. Under the Create -> Report Type, click New Custom Report Type. You will create the report type based on accounts and then add Cases as the child object. By default, all of the fields should be selected.
Now that we have our custom report type, let’s go ahead and make our report. Navigate to the Report tab and click New Report. Select the Accounts with Cases report type under the Customer Support Reports folder.

You make the report relatively simple, you want to show all open cases in a tabular format with all relevant information a rep needs. It would look something like:
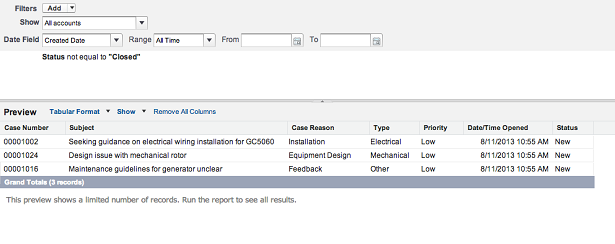
So, this is great so far. However, as you might have noticed, this is going to show all open cases across all accounts. Unfortunately, ABC Products has dedicated support assigned to specific accounts and the reps want to be able to view each account specific cases. So, we need to add a filter. The logical filter is the Salesforce Id. Unfortunately, for the standard user, being able to grab an account’s Salesforce Id, then adding it as part of the filter query, and then inserting it into the report filter is unreasonable. ABC Products Support Reps simply don’t have time for that. The better solution is to provide a link to the report from an Account’s page layout that automatically filters based on that account.
The first thing we are going to want to do is add a filter to an Account ID on our report but leave the field blank. We will use this field in our link to the report.
![]()
Next thing we are going to want to do is add a link in the Custom Links section of the Account page layout. First, we need to create that link. Under Customize -> Accounts -> Buttons, Links, or Actions we will create a New Button or Link. We want this as a Detail Page Link so we can add it to the Custom Links section of the Account page layout. To add the report as a link, we will need to know the report ID. As with any object in Salesforce, we can link directly to it with just a backslash + ID (/{recordId}). In the case of the Cases by Account report, that link is:
Note: As suggested above, you can find the ID by looking at the URL and taking the trailing value after the slash. The report above is
https://na15.salesforce.com/00Oi0000002zzhr. The important part is after the.com, or the/00Oi0000002zzhrAnother extremely important thing to note is that this ID is org specific. This means that if you create this link in a sandbox, it will not work once deployed to production.
So, we have a link to our report, but that still doesn’t handle passing a parameter to the report. So, how do we do that? Well, reports have a specific set of URL parameters. To add a parameter to the first filtered field of your report, you set it as:
pv0=paramValue
The important thing to note is the structure. It is pv (which I assume stands for paramValue), the number of the paramValue with a zero based index (so the first filter criteria is 0, second is 1, third is 2, etc…). You then add the = with the value you want it assigned with.
Let’s take a look at how this relates to our example with ABC Products. The final URL will be:
/00Oi0000002zzhr?pv1={!Account.Id}
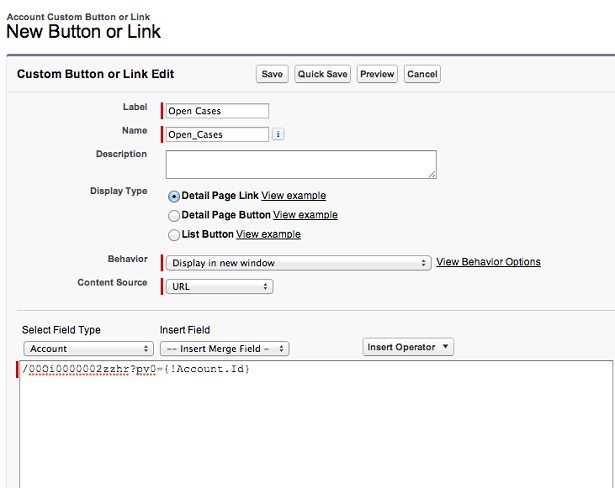
Notice how I was able to utilize the {!Account.Id} merge field and that I assigned it to the second parameter passed in by using pv1. You can now go ahead and safely add that link to your page layout under the Custom Links section. When I click the link on the Edge Communications account (ID: 001i000000KodWl), you will see the following:
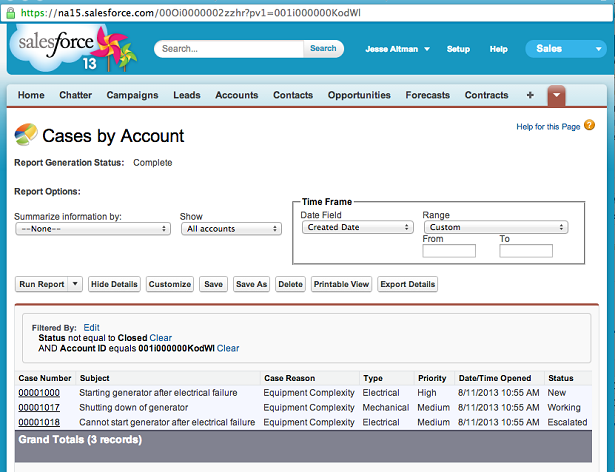
There we go! We were able to successfully add a dynamic parameter to a report by passing the value through the URL. In the future, if we want to pass multiple dynamic variables, we can chain the paramValues together using the & symbol. For instance, this would be a valid URL passing in the first three filter criteria of a report:
/{reportId}?pv0=One&pv1=Two&pv2=Three
By utilizing this process, we have made a report for ABC Products’ Support Reps that is accessible per account through a single click.
Source : <a href=”http://jessealtman.com/2013/08/passing-parameters-to-a-report-through-the-url/”>http://jessealtman.com/2013/08/passing-parameters-to-a-report-through-the-url/</a>


Recent Comments